
The Swing
The Swing Sequence

|

|

|

|

|
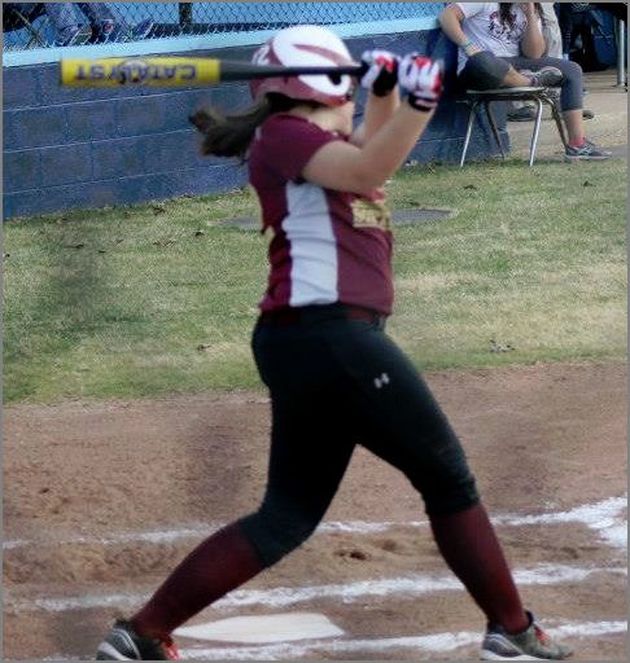
The Load
 C. J. Kastner |
The "Trigger" (these movements are done simultaneously).
1. A slight backwards movement with the hands approximately 3-5 inches. 2. A slight downward and inward turn the front shoulder. 3. A slight inward turn with the front hip and front knee. 4. Front heel of the foot slightly off the ground the ground. (helps to create balance).
5. Weight distributed to approximately 70% on the back leg. |
The Stride or Step
1. Keep the foot low to the ground during the stride.
2. Approximately 3-6 inches long.
3. Keep body weight back during the stride (sit on the back leg).
4. Keep front foot "closed"- parallel to the plate.
5. Keep front hip "closed".
6. Keep the head as still as possible.
7. Step directly towards the pitcher (square, not open or closed).
8. Start the hips and the hands as soon as the foot hits the ground.
9. Step on the ball of the foot, and drive the heel into the ground as the hips are rotating.
The Transition
 Lily Waddle |
A. The Front Side
1. The Hips (the hips should start the hands).
a. From the "closed position, the hips should "fire" straight to the ball, while simultaneously opening to the pitcher.
b. At contact, the hips should be "opened" to the pitcher.
2. The Front Shoulder
a. Keep the front shoulder "in" as long as possible.
b. Rotate "as level as possible".
c. Full/Complete rotation is the goal. B. The Swing Plane
1. From the "Load Position", the hands should "fire" to the ball in a slight downward movement to the ball (if the ball is below the hands). 2. The hands should extend directly to the ball. 3. Keep the barrel behind the hands as long as possible. 4. Contact should be made not on the downward movement to the ball, but on the way back "through" the ball. 5. The barrel should "snap through" at contact. |
C. The Top Hand -- Guides the Barrel (strong or weak)
1. Strong (good)
a. Helps keep the barrel of the bat above the hands as long as possible.
b. Helps to create a line-drive swing.
c. Helps to generate bat speed.
2. Weak (bad)
a. Aids in causing batter to hit bottom half of the ball which causes pop-ups.
b. Causes the batter to swing under the ball and miss.
D. The Bottom Hand (the guide hand)
1. Guides the bat to the ball.
2. Pulls the bat to-and-through the zone.
E. The Back Side
1. Take the back side "to the ball" (back side rotation), which will help you to hit "through" the ball.
2. Keep the "back side high", don't collapse.
3. Finish with the shoulders as level as possible.
Contact Point

Emily Gunselman
1. Head and eyes on the ball.
2. Top hand should have the palm up.
3. Bottom hand should have the palm down.
4. Arms should be extended but not "locked" at the elbows.
5. Hips should be fully rotated.
6. Front leg should be "firm" or fairly straight.
7. Back foot should be fully rotated up on the toe, or back foot off the ground for the stronger hitters.
8. Wrists should not "roll" until after contact.
THE FOLLOW-THROUGH
Alli Lambert
A. After contact, the hands should continue moving in a slight upward path until maximum rotation of the hips and shoulders have been reached.
B. The hands should finish at the top of the front shoulder and by the ear.
C. The back foot should be completely rotated towards the pitcher with the heel up turned towards the catcher.
1. The Head (during contact and follow-through)
a. Head down, eyes on the ball at contact.
b. At contact, the back shoulder should be close to the back of the chin.
c. After contact is made, the head should stay down until the back shoulder makes contact with the back of the chin.
d. During the shoulder rotation, the back shoulder should make contact with the chin causing the head to turn towards the ball allowing the batter to track the ball after contact.
Rhythm
Rhythm helps you to stay relaxed in the batter's box. If you don't have it your swing reaction will be much slower.
A. Developing a rhythmic movement in the batter's box
1. Develop a rhythmic movement at the plate that will help you to relax and get in sync with the pitcher. This movement helps you start the timing process.
B. Types of Rhythmic Movements
1. Moving the fingers while holding the bat.
2. Back-and-forth movement with the hips.
3. Wiggling the bat.
C. Avoid Extreme Movements
1. Too much movement with the bat.
2. Moving too far forward with the hips.
3. Too much movement in the shoulders.
JEC Baseball Info recieves a small commission from any product that you purchase from our affiliates, when you click through the links provided on this site. I like using this model because it doesn't add any extra costs or fees to your purchases. The commission helps to offset the time and cost of maintaining and supporting the site. Thanks for visiting this page.
Home | About | Hitting Fundamentals | Students | Articles | Product Recommndations | Affiliates | Fun Stuff
By using this website, you agree to the Privacy Policy, and Disclosure.
Clidk here to read how to Support This Site at no additional cost to you!
JEC Baseball Info
